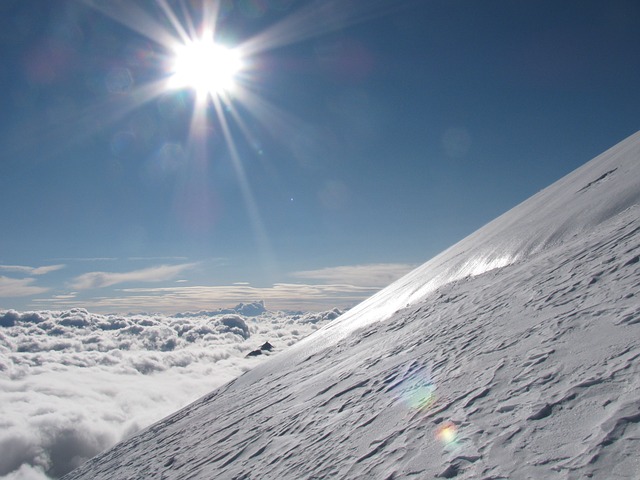
Avalanche Safety: Terrain Management – Slope Angle
Terrain management is one of the three pillars of avalanche safety along with the snowpack and weather. Unlike the snowpack and the weather, terrain doesn’t change much over time. The snowpack will develop crusts with warm weather, but the angle of your slope won’t change because of some sun or heavy winds. Terrain management is a skill that is critical to living a long and happy life in the backcountry. It’s the number one skill that can keep you safe in avalanche zones. Navigating on safe terrain negates the danger of a high hazard snowpack. It’s a huge topic, so we’re going to break it down into pieces. The first one we’re going to talk about is slope angle.
Slope angle (or steepness) is just one aspect of terrain management but is quite an important one to master. This article will describe the effect slope angle has on avalanche hazard, how to determine slope angle, and how this will influence your decision making to stay safe. If you’re totally new to the backcountry, start by reading this article.
Slope Angles – The Sweet Spot
If you remember one thing and one thing only from this article, remember that the majority of avalanches occur on slopes that are between 35 and 45 degrees (some sources say the lower end of the range is 30 degrees). There is a ‘sweet spot’ in this range – slopes between 38° and 40° seem to be the most prone to slide (38° exactly seems to be the real danger zone). Slopes between 30 and 35 degrees are also prone to slab avalanches, especially when the hazard is high, but are not quite as dangerous as the 35-45° range. Slopes below 30° may slide in extremely unstable conditions but are generally not prone to avalanches.
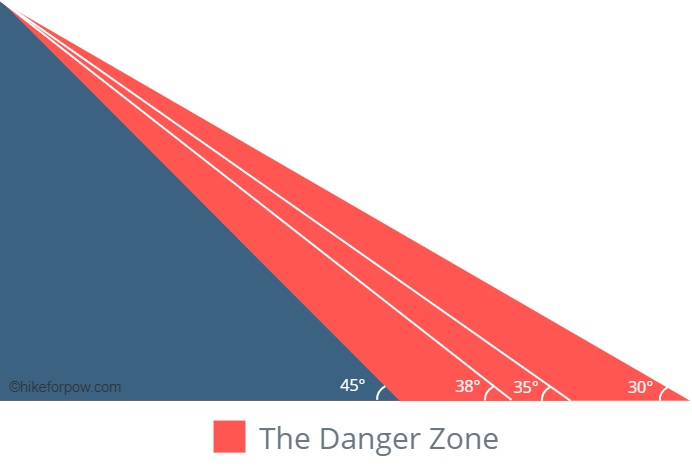
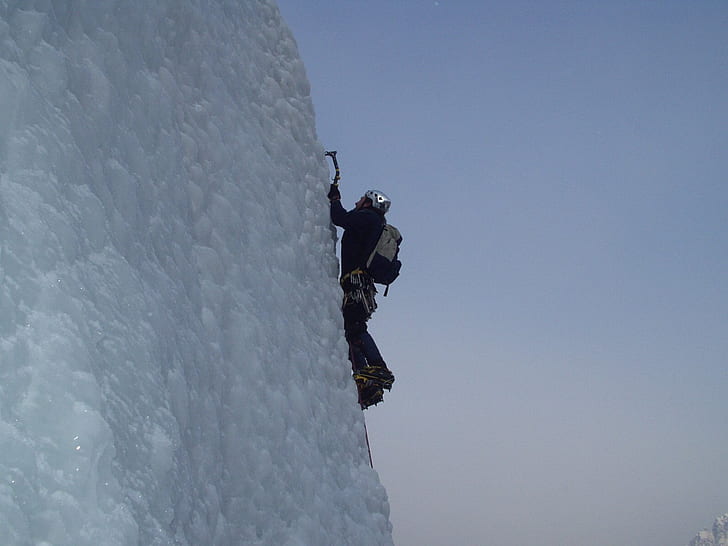
Something kind of interesting happens on slopes with angles steeper than 45°. Because they are so steep, they more frequently sluff and have smaller slab avalanches, especially when you approach 50°. The frequent sluffing (you may also see this written as sloughing) and small slab activity reduces the risk of deep and more dangerous slab avalanches. Don’t take this to mean that deep slab avalanches never occur on really steep slopes. They do, just less frequently than on slopes that are in the sweet spot for avalanches (38-40°).
Not So Sweet
Unfortunately for us backcountry skiers and boarders, slopes between 35 and 45 degrees are the slopes that we ski on most often. This (and steeper of course) is the range of ‘double black diamond’ steepness, so these slopes are a ton of fun. That’s the bad news. The good news is that knowing that the slope angles we love to ride are the most dangerous, we can make better decisions in the backcountry. If conditions aren’t quite right, maybe you shouldn’t ski that perfectly angled slope and instead ski something a bit mellower.
At an angle of 30°, slopes are just barely steep enough to slide but they reach peak slide danger at 38°. To the human eye this isn’t much of a difference, but in terms of avalanche danger the difference is immense. Avalanche experts develop a keen eye for angles in the 30-40° range and you would do well to work on this skill. The next section explains how to practice measuring slope angles.
A Note on Climate
In drier, continental climates (i.e. more inland), slab avalanches rarely occur above 50°. But in wetter coastal climates, snow tends to ‘stick’ better at steeper slope angles. Deep slab avalanches have been know to occur on slopes as steep as 60°, so keep that in mind if you’re adventuring on a coast.
Fun Facts About Triggering a Steep Slope
Interesting fact – triggering an unstable slope from below is almost as easy as triggering it from above. If a slope (or a slab) is resting on an unstable layer and you compress the snow at the bottom of the slope, you might compromise the unstable layer and remotely trigger the slope above you. Bad news. The reason is that everything is connected, and you compromised the weak support that was holding up the slope.
In high hazard conditions, it’s also common to trigger adjacent slopes. The slope you’re on might not be steep, but if a steep slope that is connected to it slides it may pull you along with it. Same deal on ridge tops and the top of steep slopes. Be aware that if you trigger a slope from above, there is the possibility that it will pull you down with it.
The takeaway: give steep slopes a wide berth when the avalanche hazard is high or if your spidey sense is tingling.
Determining Slope Angle
Luckily for us there are a few ways that we can accurately determine the steepness of a slope. Some of these methods work without setting foot anywhere near the slope in question which is helpful in treacherous conditions.
Inclinometers or Clinometers
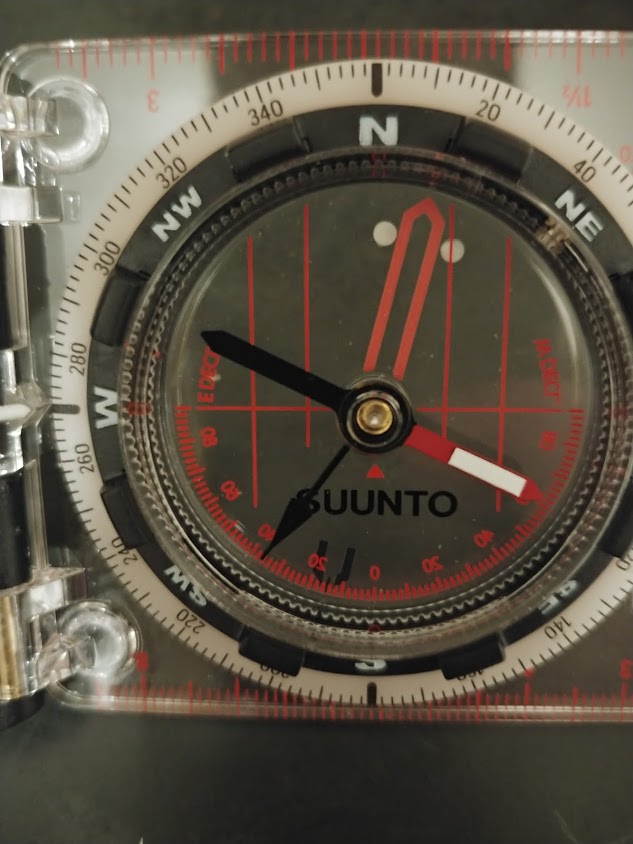
There is a tool called a clinometer or inclinometer that is specifically designed to measure slope angle. Many higher end compasses have a built in clinometer. Inside the compass dial there is an additional needle that gives you an angle reading when the compass is tilted on edge. You can align the edge of the compass with slopes in the distance and you can also sight up or down slopes. When looking up or down a slope, you sight along the edge of the compass and use the mirror to read the clinometer. Very useful.
I’ve been using a Suunto MC-2 compass and the clinometer is super easy to read using the mirror or looking at it directly. I don’t have the MC-2G, the global edition, but apparently it has a slightly better needle. It doesn’t have to be level to take a reading. The Silva Expedition S is another reasonably priced compass with a built in clinometer that gets pretty good reviews.
Backcountry Access also has a small slope meter tool that you can keep in your pack. This is nice and compact and is useful for measuring slopes that you are on as well as slopes in the distance. It can’t be used to sight up or down slopes unless you rig up a mirror somehow or use a friend – probably possible, but not ideal.

Using Your Poles
You can also get a rough estimate of slope angle using your ski poles. This only applies to slopes you are standing on, so is less useful than a clinometer. But if nothing else, it’s a good training tool to help you learn what a 30° slope feels and looks like.
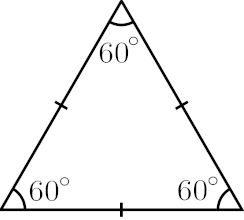
Basic trigonometry: an equilateral triangle, like the one pictured below, has three equal side lengths and three equal inside angles of 60 degrees. What we’re going to do is create an equilateral triangle with our poles. This is a bit confusing, so read it through a couple of times if you need to. It took me a while to get it and I’m pretty decent at math…
The Pole Technique
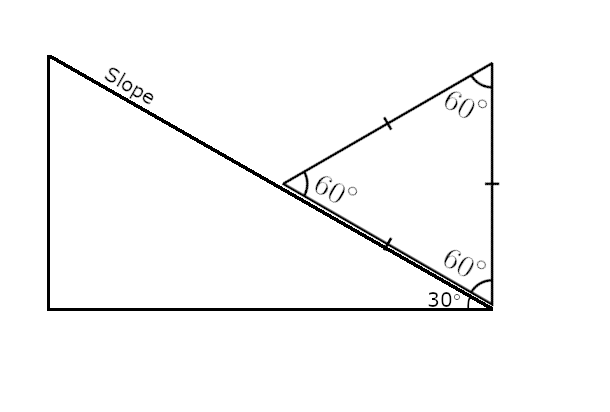
First, lay one pole on the snow in line with the slope. Mark the snow at the top and bottom of the pole. Then take both your poles and put the end of one in the top mark you just made. Hold it out from the slope in line with the marks you first made, keeping the end in the snow on the top mark. Allow the other pole to dangle freely from the other end of the first pole (hold them together loosely with your hands). Lower the two poles until the point of the second pole touches the snow. Be sure to keep the point of the first pole in the top mark. You’ve created a triangle using the line/marks you first made and the two poles in your hands, one of which is dangling freely.
If the dangling pole touches the bottom mark, you’ve created an equilateral triangle with 3 equal sides and 3 equal inside angles of 60°. Check out the super high tech graphic below. Your dangling pole and the ground make a 90° angle. Since we know the inside angle of the triangle is 60°, that tells us that the slope angle must be 30°.
You don’t need to remember the why. Just remember that if the dangling pole touches the bottom mark exactly, the slope is 30°. Lower end of avalanche danger.
On steeper slopes, the dangling pole will touch the snow further down the slope than the bottom mark. The rule of thumb is that every 10cm (4 inches) past the mark is another 3° of steepness. Isn’t math great?
This isn’t the most accurate method, but it can certainly give you an indication of whether you’re in the danger zone or not.
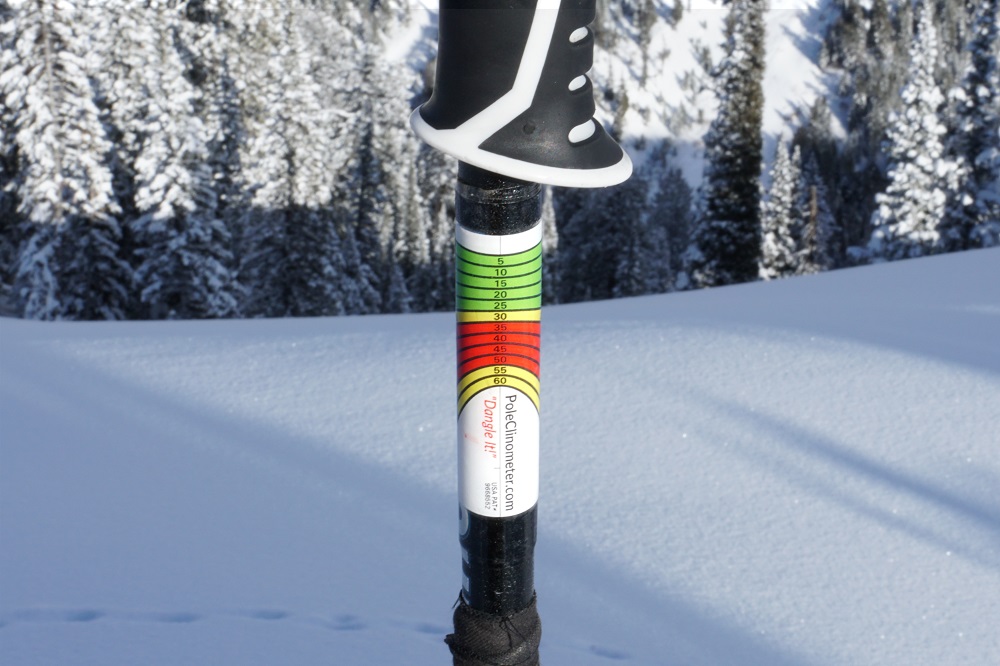
PoleClinometer Slope Meter
Another practical and effective option is the PoleClinometer sticker, which is pretty clever. It’s a sticker that you apply to your ski pole with lines on it that correspond with slope angles. It will fit pretty much any ski pole (aside from curved race poles) and is quite reasonably priced ($14.99 at the time of this article). It has a durable plastic sleeve that protects the sticker, so you don’t have to worry about it ripping off or getting damaged.
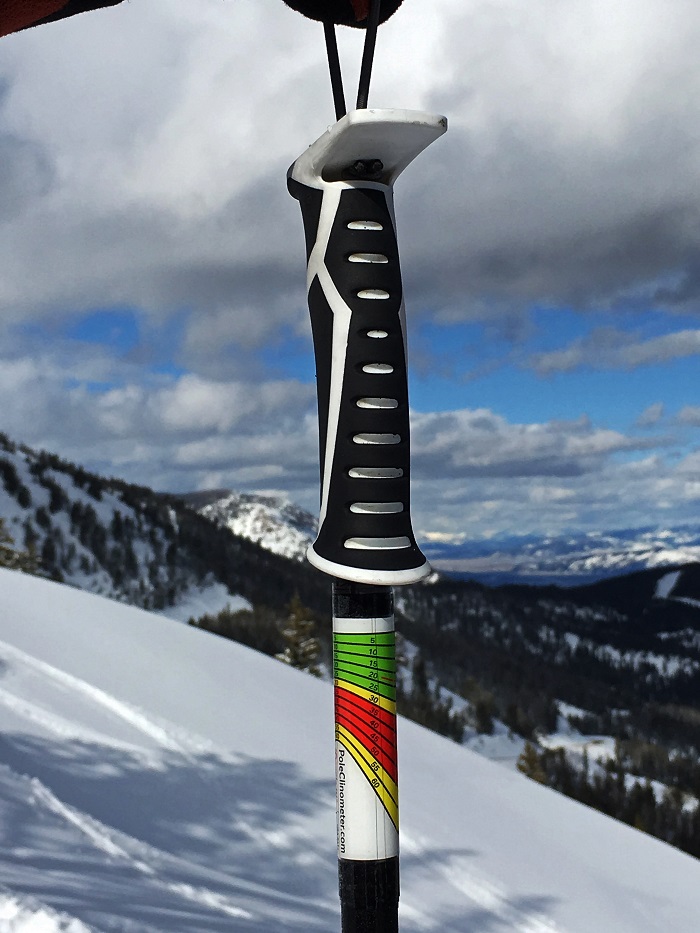
It works to sight slopes in the distance and also works looking down a slope from the top. The way it works is you dangle your pole in front of you and match up the slope angle with the line on the sticker that aligns with the slope. Each line on the PoleClinometer sticker is labeled with the angle so you know what the slope angle is. Neat!
You can pick one of these up at Garage Grown Gear, which is a cool site that has a good selection of outdoor gear from smaller companies. Check out the video below for a tutorial.
We Know the Slope Angle: Now What?
So what do we do with this newfound knowledge of the slope angles all around us? The main thing is to use this information to choose which slopes to avoid. Both when climbing and when descending.
When setting a skin track, you can use your newfound skills to link the lowest angled slopes to get to your destination. You will also be able to spot potentially dangerous adjacent slopes from a distance and stay well away from them.
The angle of a slope also plays into your decision making when descending. On a high risk day you certainly want to avoid slopes over 30 degrees. Possibly ever lower angles if the hazard is exceptionally high. Ideally you wouldn’t be in the backcountry in this scenario, but on a multi-day trip it can happen. Combined with the avalanche report and signs that you’ve picked up throughout the day, the slope angle is one more piece of the risk assessment puzzle. Use it to your advantage.
Remember that slope angle is just one piece of the puzzle. It’s an important one, but being educated about the other aspects of avalanche danger as well is the best way to stay safe in the backcountry.